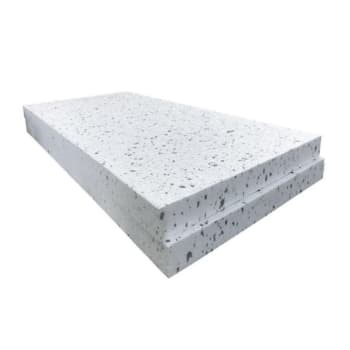
Polystyrene Insulation Board
(20 Products)Polystyrene insulation is a synthetic polymer derived from the monomer styrene (a petroleum-based product). It comes in two main forms: Expanded Polystyrene (EPS) and Extruded Polystyrene (XPS).
EPS provides basic thermal properties, making it more suited for less demanding applications. XPS delivers superior insulation capabilities, making it the preferred choice for applications that require maximum thermal efficiency.


.jpg)

What Is Polystyrene Insulation?
Polystyrene starts life as the same basic plastic resin, but the manufacturing route splits it into two distinct foams.
EPS (expanded polystyrene) blows the beads up with steam and pentane so they fuse into a big, lightweight block that is about 98% trapped air. XPS (extruded polystyrene) melts the resin, injects a blowing agent, then pushes the mix through a die; the result is a denser, closed-cell sheet with a smooth skin that shrugs off knocks and water.
EPS is lightweight and cost-effective, but its insulating capabilities are modest compared to other materials. It's often used in situations where moderate insulation is acceptable, such as in packaging or construction applications where cost is a primary concern.
Extruded polystyrene (XPS) insulation outperforms expanded polystyrene (EPS) as a result of its denser, closed-cell structure. Manufactured through an extrusion process, XPS forms a continuous, uniform foam with a tough, smooth skin on both sides.
This closed-cell makeup improves its thermal performance and makes it highly resistant to water absorption. Because of these properties, XPS is a popular choice for roofing systems and other applications where the insulation may be exposed to moisture.
To greater understand the difference between both of these materials, take a look at our comprehensive blog on the Differences Between XPS and EPS.
Compressive Strength & Best Uses
- EPS 70 - 70 kPa | domestic floors, external wall insulation.
- EPS 100/150 - 100-150 kPa | warm-roof decks, light commercial floors.
- XPS 300 - 300 kPa+ | raft slabs, inverted/green roofs, car parks.
Fire Safety
Raw polystyrene foam is combustible. Both EPS and XPS, even with flame-retardant additives, land in Euroclass E under EN 13501-1, meaning they must sit behind plasterboard, render, screed or concrete in occupied spaces.
Treat the foam as part of a wider fire-stopping strategy, not as the fire line itself.
Cost
Labour requirements are much the same for both materials, so the primary cost difference lies in the price of the insulation itself.
XPS is more expensive per m² due to its higher density and performance. However, its added compressive strength and thinner required build-ups often justify the extra cost in demanding applications like inverted roofs or load-bearing floors.
EPS remains the more economical option where conditions allow.
How to Cut Polystyrene Insulation Boards
- Prepare Your Workspace: Ensure you have a flat surface to work on and wear safety glasses.
- Measure and Mark: Use a straight edge and a marker to outline your desired measurements on the insulation board.
- Use a Sharp Knife: A utility knife or a hot wire cutter can be used. If using a knife, ensure it's sharp for cleaner cuts.
- Score and Snap: Gently score the board along the marked lines and then apply gentle pressure to snap it.
- Smooth Edges: Sand any rough edges for a clean finish.
Installation Tips
- Keep foams away from solvents (PU glue, bitumen, gasoline).
- UV degrades XPS in weeks - cover if left exposed.
- Always over-board with plasterboard/render/concrete for fire.
- Stagger & tape joints to kill wind-washing in warm roofs.
Frequently Asked Polystyrene Insulation Questions
Is Polystyrene Insulation a Good Insulator?
With thermal conductivity values ranging from 0.034 to 0.038 W/m·K for EPS and around 0.030 for XPS, it delivers reliable energy savings at a price point that works.
Better still, XPS offers high compressive strength and moisture resistance - making it a smart choice for foundations, flat roofs, and floors.
Are Polystyrene Insulation Boards Good For Compressive Strength?
Kingspan GreenGuard boards have a compressive strength of 300 kPa, whereas EPS70 polystyrene boards have a compressive strength of 70 kPa.
The higher the compressive strength, the longer the material maintains its properties. GreenGuard boards perform well when they are installed in heavy roof structures and underneath heavy floors.
Many commercial property owners invest in polystyrene foam because it maintains its thermal properties despite heavy footfall.
What Does the Number in the Title of Each Expanded Polystyrene Board Indicate?
The number signifies the compressive strength. For instance, EPS70 has a compressive performance of 70 Kilopascal (kPa).
Why Is Compressive Strength Important When Selecting Polystyrene Foam Insulation?
Compressive strength is vital as it determines the load resistance of the material. A higher compressive strength means the insulation can withstand more external pressure.
Do XPS Foam Boards Also Have Numbers in Their Titles? What Do They Indicate?
Yes, like EPS, XPS foam boards have numbers. For example, all XPS products in our range have a compressive strength of 300kPa, indicating they can withstand greater pressure.
Which Is More Suitable for Commercial Spaces: EPS or XPS?
XPS is more recommended for commercial spaces due to its higher compressive strength, making it ideal for insulating heavy floors and roofs.
Are Polystyrene Insulation Boards Sustainable?
Unlike XPS, EPS can be constructed with recycled content, making it the more environmentally friendly option of the two.
However, this sustainability does not come without its disadvantages. The voids between the polystyrene beads of EPS also make it more permeable and susceptible to water absorption. And with the absorption of water, comes the dreaded decrease of R-Value (dulling down its already quite low thermal properties).
Resisting water is critical for high-performance insulation due to the fact that water is an excellent conductor of energy.
Water ingress will ultimately hurt the overall thermal effectiveness of the board since water allows energy to short circuit or bypass its way through the board’s structure; reducing the overall effectiveness of thermal performance.
It should be noted then, that EPS’ potential to absorb water is 10 times greater than XPS, which does not absorb water at all, due to its closed-cell structure. This enables it to maintain insulating power in the presence of water.
Related Articles

How to Install XPS Insulation

How to Insulate a Shed
