Internal Door Linings
(6 Products)Door linings are timber planks fitted into the aperture to form a basic framework for a door. Unlike casings, door linings do not have a pre-machined rebate; instead, the door is hung within the open frame, and loose pin door stops are fixed separately to hold the door in place when closed. Once installed, an architrave (a decorative moulding) is applied around both sides of the frame to conceal fixings and enhance the appearance.
What Are Internal Door Linings?
A door lining is the inner section of the door frame, comprising the vertical jambs that are fixed to the wall to form the sides of the door opening. It provides a secure base for attaching both the door and its hinges, ensuring that the door is properly aligned and moves without any issues.
Overall, door linings form the inner framework of an entranceway, ensuring smooth door operation while concealing any exposed brickwork, plaster, or rough edges.
Benefits
- Smooth Door Operation: A properly installed door lining ensures that the door swings open and closed effortlessly, reducing the chances of sticking or jamming.
- Enhanced Structural Support: Door linings provide a solid framework for attaching the door and its hinges, which helps maintain the door’s alignment and durability over time.
- Neat, Finished Look: They create a clean finish by concealing any rough edges or uneven surfaces around the door opening. This polished appearance is often further enhanced with an architrave.
- Ease of Installation: Door linings simplify the process of hanging a door. Since the lining serves as a dedicated frame, it can make the installation process more straightforward and less prone to errors.
- Protection of Surrounding Materials: By covering up the raw edges of the wall or brickwork, door linings help protect these materials from potential damage caused by frequent door movement.
- Versatility: They can be used in both new construction and renovation projects, making them a practical choice for various door installation scenarios.
How to Install a Door Lining
Crafting a functional doorway starts with a well-installed door lining. Whether you're creating a brand-new entry or replacing an ageing frame, this guide will walk you through each step to ensure a secure, well-aligned framework that enhances both the look and performance of your door.
Tools Required
- Spirit level
- Tape measure
- Screwdriver
- Mallet or hammer
- Saw
- Wood glue
- Screws
- Set square
Time Estimate
Installing a door lining can take a few hours, depending on the complexity of the task. Ensure you have a full afternoon available to complete the job without rushing, as making any mistakes may require you to start over.
Step-by-Step Instructions
- Remove the Old Lining (if applicable): If there is an existing lining that’s damaged or outdated, remove it first.
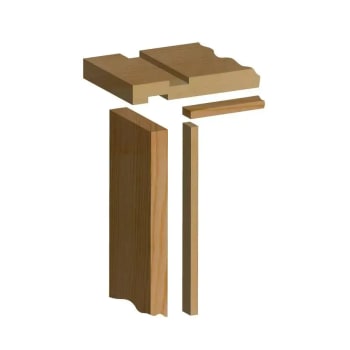
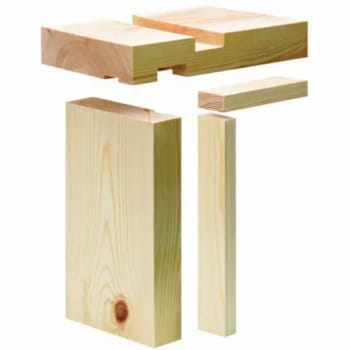
- Prepare the New Lining Kit: Your new door lining kit should include three main components: two side jambs and the head. The jambs are the vertical pieces that will sit along the sides of the door, while the head will sit across the top of the frame.
- Measure and Mark: Place the side jambs against the wall studs, ensuring they are aligned. Use a pencil to mark the desired height of the door on both jambs. This ensures your door will fit properly when hung.
- Adjust the Length: Measure the thickness of the head piece and subtract that from the overall height. Then, hold the head piece up against the top of the door and mark the correct length.
- Cut the Lining Pieces: Double-check your measurements before cutting the jambs and head to size. It’s important to measure twice before cutting, as making the lining too short can damage the pieces, while cutting too little won’t allow for proper fitment.
- Assemble the Lining: Lay the pieces out in a large, clear workspace. Fit the jambs into the notches of the head piece. Tap the pieces gently with a mallet to ensure a snug fit. Once they are in place, use screws to secure the joints, making sure they are straight.
- Check Angles and Alignment: Use a set square to ensure that the corners of the lining form perfect 90-degree angles. A temporary brace, such as a right-angled triangle (30 cm head, 40 cm leg, 50 cm batten), can be used to stabilise the frame while working.
- Install the Lining: Position the assembled lining against the wall. Check that it fits correctly and that the head is level. If necessary, use wooden spacers to adjust and ensure the jambs are perfectly vertical.
- Secure the Lining: Once the alignment is correct, use screws to attach the lining to the wall studs. Make sure not to over-tighten, as this can cause warping. Use a spirit level again to confirm everything is straight.
- Final Adjustments: If you notice any warping or misalignment, loosen the screws, make adjustments, and retighten. It’s important that both the head and jambs are level and aligned for a smooth installation.
Additional Tips
- Wall Protection: Consider adding a door stop on the wall to prevent the door handle from damaging the surrounding area.
- External Frame: You may want to add an external frame around the lining to complete the look and ensure it blends with the rest of the room.
Frequently Asked Internal Door Linings Questions
How Do Door Linings Differ From Door Casings?
While both components are used to finish a door opening, door linings form the structural inner frame without a pre-cut rebate for the door. In contrast, door casings include decorative elements and a built-in rebate. Door linings focus on function - providing support and ensuring proper door movement - whereas casings enhance the visual appeal.
Can I Install Door Linings Myself, Or Should I Hire A Professional?
While a skilled DIYer with the proper tools and attention to detail can install door linings, precise measurements and alignment are crucial. If you’re not confident in your carpentry skills, consulting a professional can help ensure a secure and well-aligned installation.
What Maintenance Do Door Linings Require Over Time?
Door linings are relatively low-maintenance. It’s a good idea to periodically check for loose screws, signs of moisture damage, or warping. Addressing these issues early can help maintain smooth door operation and extend the life of the installation.